1 Running a Test, Reporting and Exporting
 |
431-955 February 2020 |
2 Introduction
VectorPro™, VectorPro™ MT and VectorPro™ Lite are all registered trademarks of Mecmesin Ltd.
VectorPro is a dedicated software solution used for the programming and acquisition of data from a range of Mecmesin test stands and instruments.
2.1 User Guidance
This user manual section covers the running a test in VectorPro as well as reporting and exporting data only, for further guidance relating to other aspects of VectorPro please refer to one of the documents listed below.
2.1.1 VectorPro™ User Manuals
Click one of the links below to navigate to the applicable user manual.
 |
 |
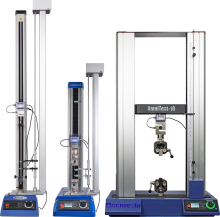 |
A detailed guide to designing a test for VectorPro MT compliant test systems. |
|
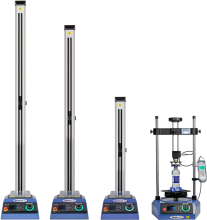
Covers designing a test for VectorPro Lite compliant test stands and devices |
 |
 |
All Tests Viewer and Results Viewer A guide explaining the functionality of the All Tests Viewer and Results Viewer. |
 |
 |
|
View the latest version of the Mecmesin VectorPro Software License Agreement. |
3 Running a Test
When permission is given to a user for a test, a tile for the test will appear in their ‘Workspace’. When images are applied as a test attribute, the first one placed in the test shows as the background in the tile:
The left-hand test tile has no image available and no edit permission. The right-hand tile has an image available and edit permission enabled.
The latest version of a test is displayed top right. The blue buttons enable viewing of results, comparing tests and, where permission to save is given, test editing and copying.
Any test can be found by any user given permission for the ‘All Tests’ viewer.
3.1 Open a Test
From the individual test icon, the latest version (shown in the icon) is selected. Just click the icon to enter the graph display and be ready to run the selected test.
A test can also be selected from the ‘All Tests’ viewer using the drop-down list, from here any version of the test can be used:
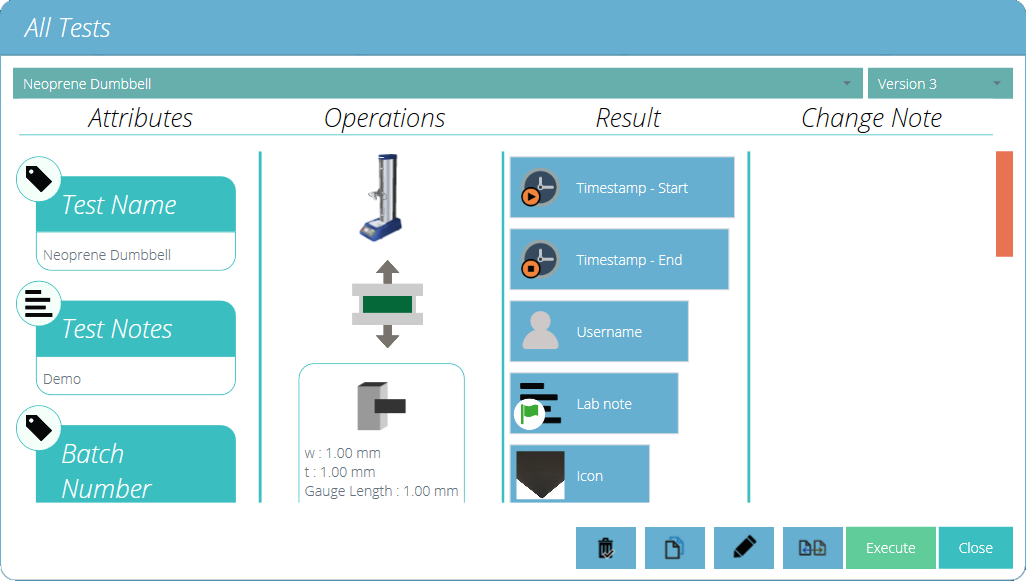
Click ‘Execute’ to progress to Graph display for running the test.
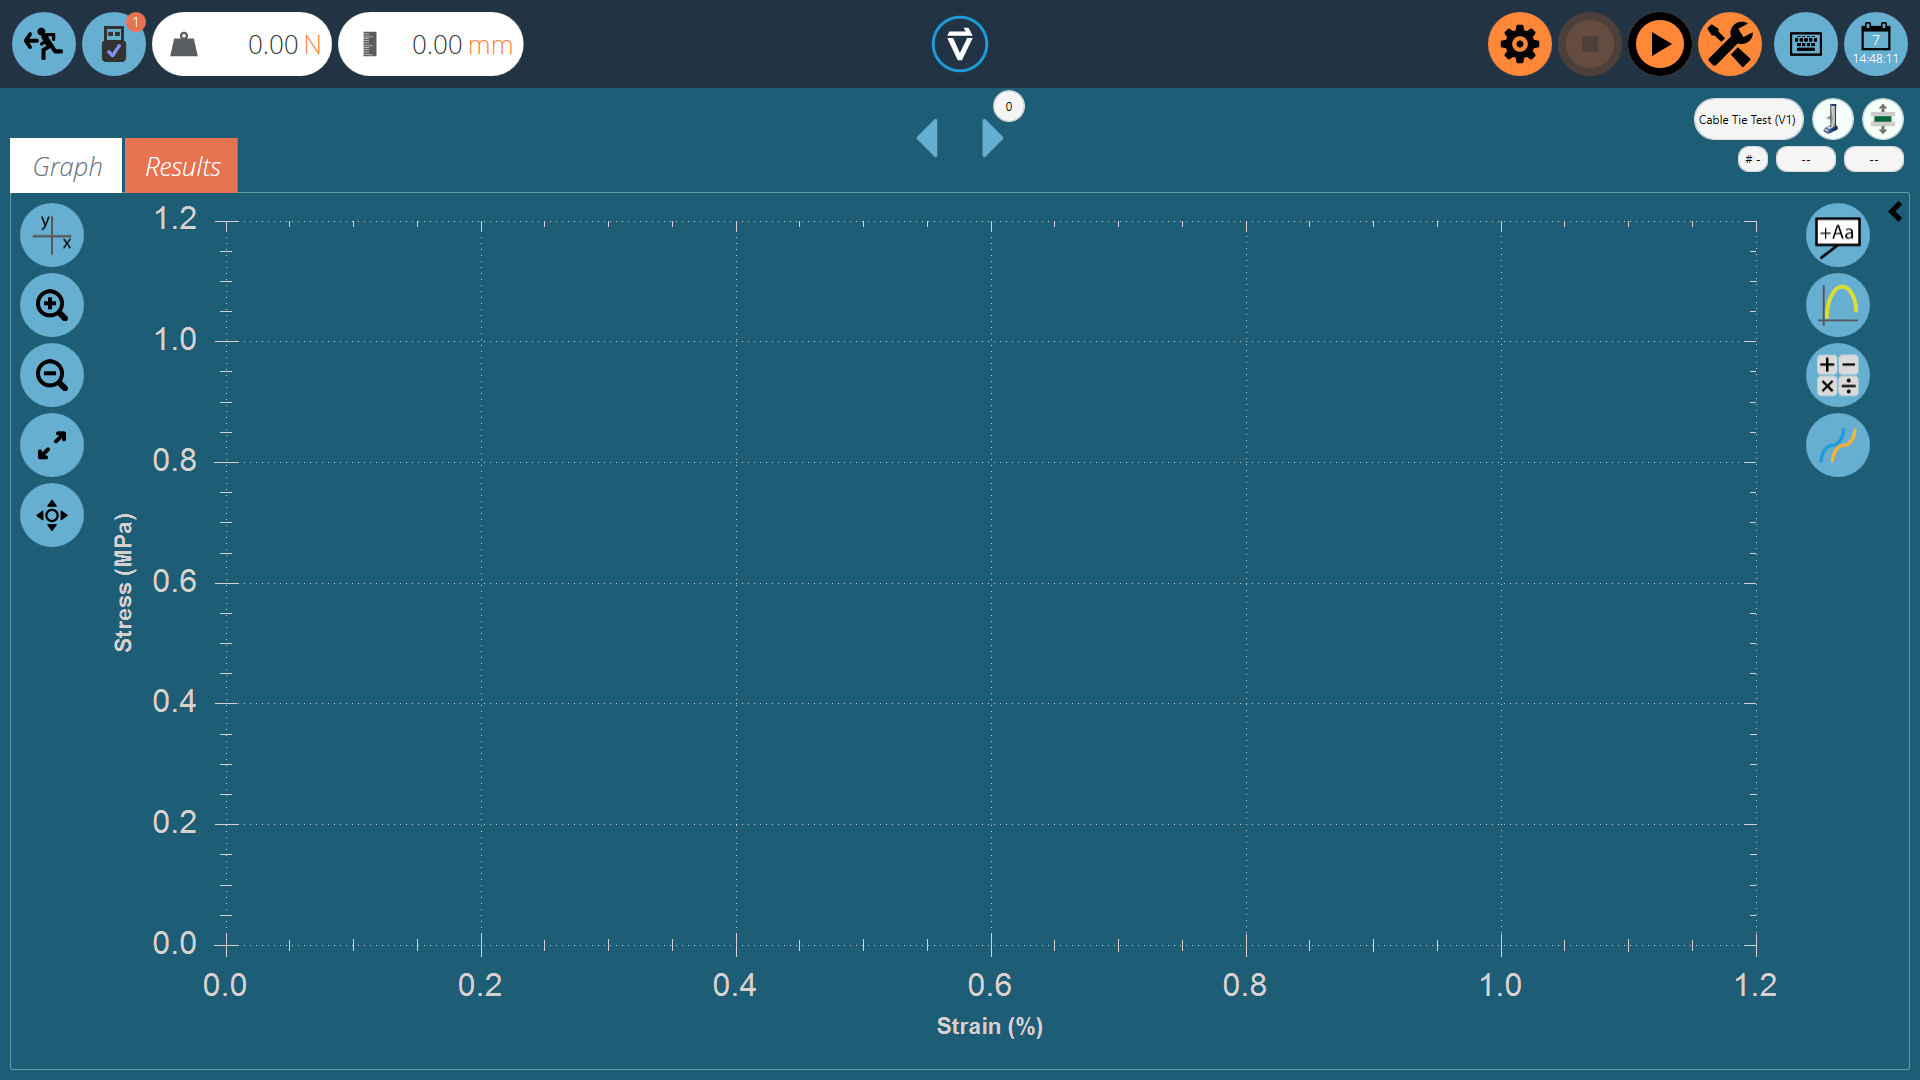
Here the test sequence has been opened and is ready to be executed, basic details such as the test name and version are displayed top right. In this example:
- The load and displacement readings can be reset on either the front panel of the instrument by entering jog mode, or by using the tare button when selecting the tools symbol in the top right-hand side of the screen. (see section 'Control bar')
- Any of the graph controls can be used before a test. If required, the user can set the X and Y-axis to suitable domains, such as Stress and Strain prior to starting a test. Then the current test data is plotted on a pre-configured graph. Once the test has started the axis are fixed until the test has finished.
3.1.1 Control Bar
The control bar located at the top right of the screen (orange buttons) is used when running a test. Below are definitions for each of the functions within the control bar:
|
Settings: described below in detail, sets the options for auto-exporting results and/or data at the end of each test. |
|
|
The stop button ends the test and stops the stand motor. Important! This action may leave residual load, which must be removed by using front panel jog controls to ensure the machine is safe. |
|
|
The play button starts the test. The test system must be in test-ready mode. If not, an alert message is given regarding the stand’s status (e.g. in jog mode, displaying a menu). |
|
|
Zero the displacement, load and extensometer value (if fitted) of the test system. |
|
|
The tools icon opens the test stand zero control panel. (Motorised test stands only). |
3.1.2 Test Stand Zero Control Panel
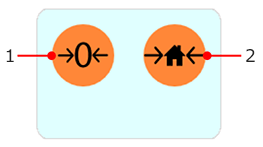
The test stand’s zero control panel appears when pressing the tools icon located in the control bar at the top right of the screen.
Within this panel there are two functions, zero the displacement, load and extensometer (if fitted) or set the home position for the test stand.
Pressing the ‘Set home position’ button will set the home position at the current displacement and store this displacement and time below the button (see the image below). This home setting can be used as a datum point for a sample loading position when testing, or returning after a test.
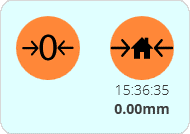
The stand can move to this position by using the home operation in the timeline or by pressing the home button on the stand front panel at the end of the test.
Important! When the test stand returns to the home position the displacement is not recalled automatically. If the displacement has been zeroed between setting the home position and returning to home (such as in a timeline operation), the current displacement shown will be relative to that last zero position. The stand position will still be at the defined and set home position.
This function is only compatible with motorised USB test stands.
3.1.3 VectorPro Lite™ - Test Triggers
For VectorPro compatible test stands and instruments, it is possible to set triggers that start and end the data capture for the test at a specific load/torque or time set point.
| Click on the settings icon (pictured left), the menu shown below will then appear. Here the user can set the start triggers. Values can use either a time or a load/torque entry to start and end the data capture. |
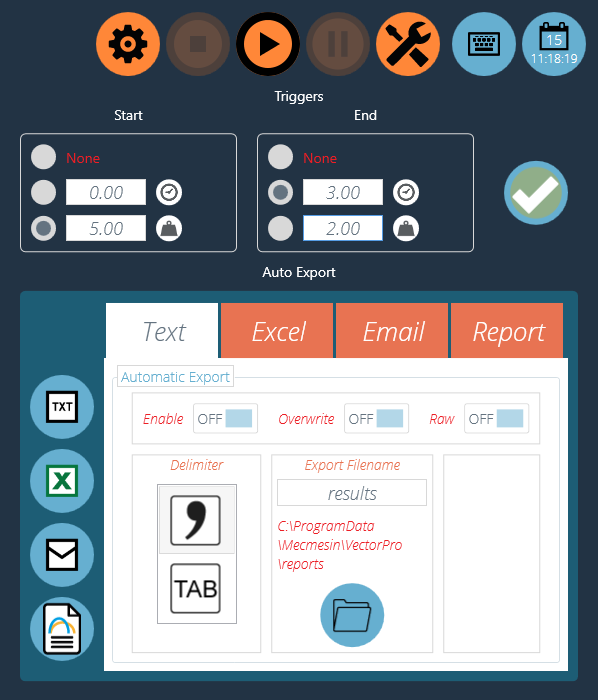
In the image above pressing play will start the test operation, data capture will begin once the indicated load is above 5.00N. Data capture will stop once the time elapsed has reached 3.00 minutes.
3.1.4 Live Display Bars

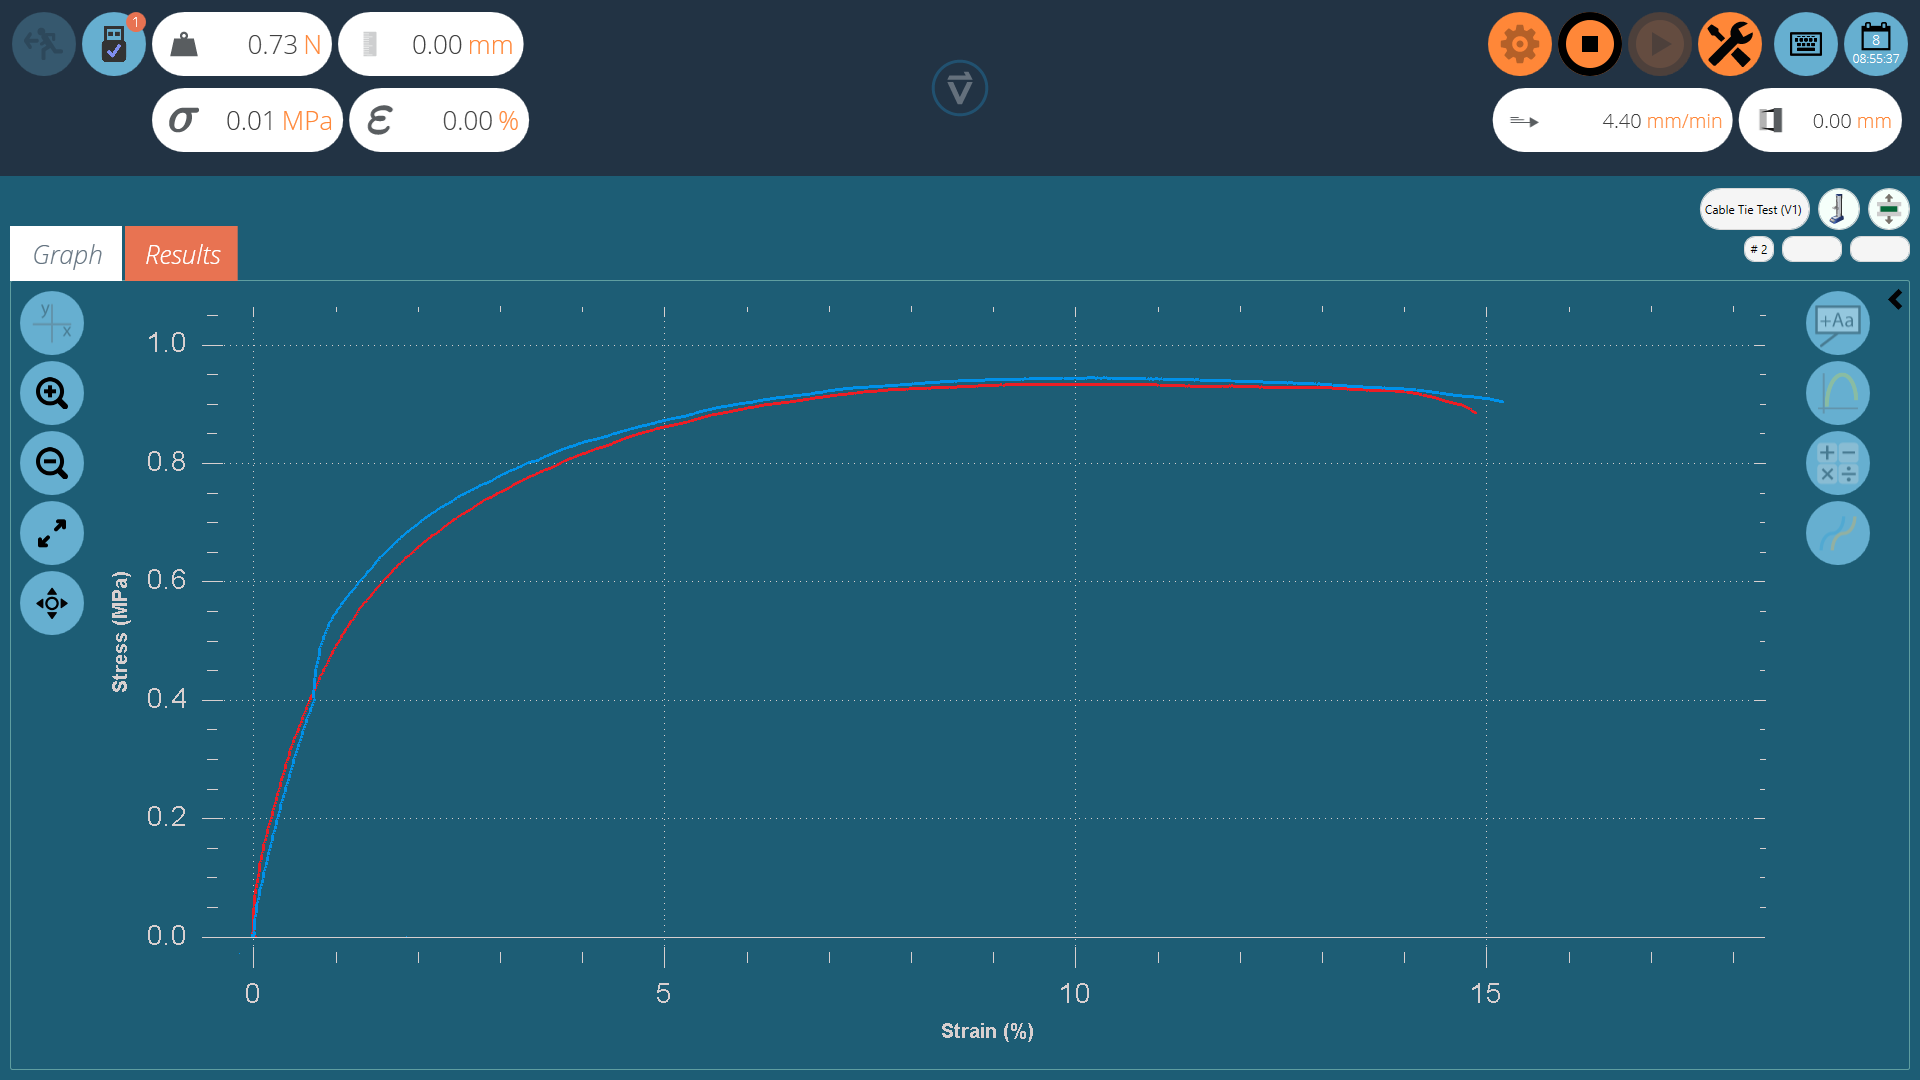
An example of a test being run. At this point, two samples have been captured with a third currently being recorded.
Within VectorPro there are two main live display bar sections, these are situated in the top right and top left-hand sections of the screen when running a test. These bars display real-time information from the test system and extensometer, giving user’s quick reference information during the entire running of a test program. Stress/strain and extensometry readings are only displayed for VectorPro MT compatible test stands.
Left-hand display section.
| 1 | Number of devices connected |
|---|---|
| 2 | Load reading |
| 3 | Displacement reading (from test stand encoder) |
| 4 | Strain reading |
| 5 | Stress reading |
Right-hand display section.
| 1 | Test stand speed |
|---|---|
| 2 | Displacement reading (from extensometer device) |
4 Reporting and Exporting
4.1 Exporting
From the Graph or Results view, the user can export raw data and calculated results to comma or tab-separated files or to an Excel workbook. Results can also be emailed as a table or formatted as a PDF report.
Export settings are changed by clicking the ‘Settings’ icon in the control bar (see section 'Control bar'), located in the top right of the test run screen or they can be accessed through the export toolbar located in the ‘Results’ screen, see the image below:
4.1.0.1 TXT
Hitting the ‘TXT’ export button will generate a results file which contains calculated and statistical data, with the option to export raw data. Choose between a comma or tab-delimited format. If ‘Raw’ is switched on, additional files will also be created for each sample currently selected. The results file name chosen is supplemented by a date and time stamp.
The left-hand image shows an example Results file, the right-hand image shows a Raw data file.
4.1.0.2 Excel
A single workbook will be generated with results in the first worksheet. If ‘Raw’ is enabled a worksheet of all data points for each sample currently selected. The filename chosen is supplemented by a date and time stamp. If ‘Overwrite’ is enabled, the timestamp in the filename is replaced by the test name. Switch ‘Display’ to ‘On’ for the file to open after being created.
4.1.0.3 Email
Enter complete and valid email address.
4.1.0.4 Report
This creates a defined report, which can be printed and/or saved as a PDF file. For more information, see the 'Report' section of either the Designing a Test MT Version User Manual or Designing a Test Lite Version User Manual, depending on your test system.
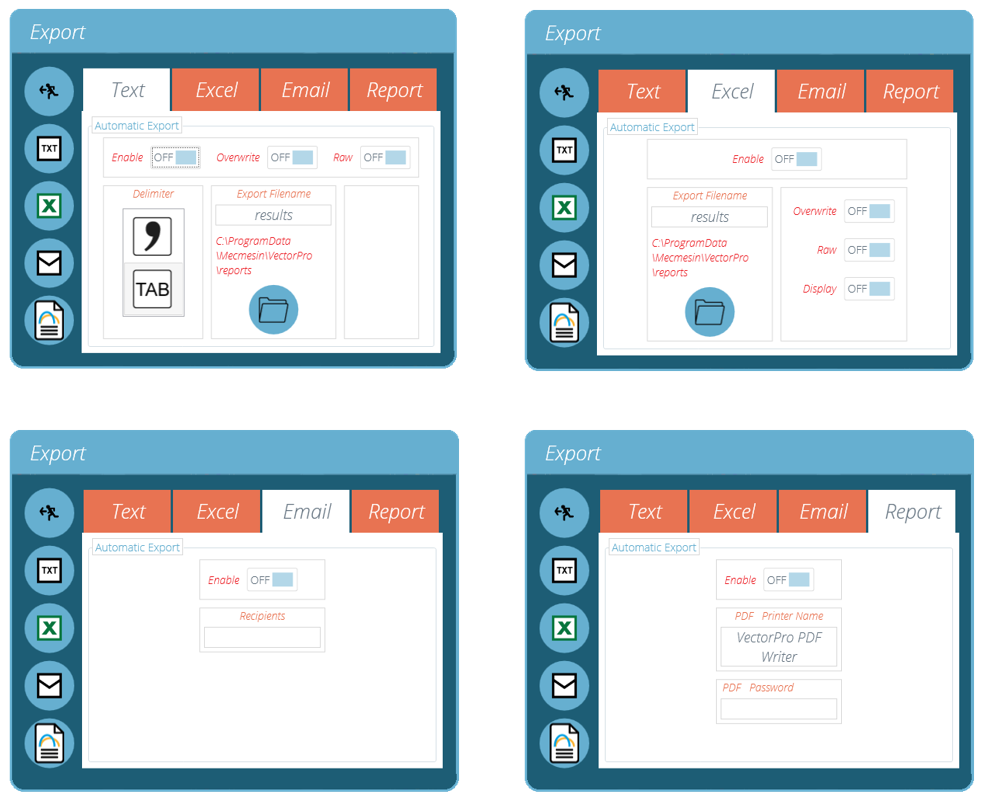
To export results in the desired method click on one of the four icons on the left-hand side. This will export the data using the pre-configured settings to a user-definable location.
4.1.0.5 Manual Export
The export toolbar is a quick way to perform a manual export, for example at the end of a series of test runs. Simply configure file names, locations and export settings then export the results in the desired format.
4.1.0.6 Automatic Export
Automatic export will create files after every test. By default files are incremented and documents aren’t overwritten. To avoid accumulating files, set export to ‘Overwrite’. Be careful to use folder destinations to distinguish collections of results for different tests, especially when using the overwrite function.
4.1.1 File Naming Behaviour
File naming is dependent on the overwrite option. Tab-separated files are exported as .txt files and comma-separated files exported as .csv files.
4.1.1.1 TXT with Overwrite
First Export:
- One file for results: [file name]-[test name](test version).csv,
- Plus (if raw data enabled):
- a file for each sample: [file name]-[test name](test version)-sample-#.csv
Second Export:
The results file is overwritten, along with any corresponding sample files.
- If more samples have been selected, new files are generated. If fewer, the older files remain.
4.1.1.2 TXT with No Overwrite: Time Stamping Makes Results File Unique
First Export:
- One file for results: [file name]-[test name](test version)-YYYY-MM-DD-hhmmss.csv,
- Plus (if raw data enabled):
- a file for each sample, [file name]-[test name](test version)- sample-#.CSV (no timestamp)
Second Export:
A new time-stamped results file is generated, along with any corresponding sample files.
- If more samples have been selected, new files are generated. If fewer, the older files remain.
4.1.1.3 Excel with Overwrite: Test Name and Version Identifies the File
Please note when exporting raw data to Excel, that the whole workbook may take a few minutes to complete.
First Export:
Generates the file: [file name]-[test name](test version).xlsx. If raw data is enabled a named worksheet for each sample will also be generated. The version number is that of the test in use when the export is made.
Second Export:
Any correspondingly-named file will be reused.
- The Results worksheet will be replaced,
- New raw sample worksheets for previously unrepresented samples inserted,
- Worksheets for samples of the same name will be repopulated,
- Worksheets not represented in the later export will not be affected.
4.1.1.4 Excel with No Overwrite: Time Stamping Makes Results File Unique
First Export:
- Generates a file: [file name]-yyyymmdd-hhmmss.xlsx, containing a worksheet for results and (if raw data enabled) a worksheet for each sample.
Second Export:
- A whole new [filename]-[timestamp].xlsx is generated as if it were a first execution.
5 Further Information
For more information relating to VectorPro, please return to the User Guidance section of this user manual and continue to the next applicable user manual.