1 Introduction and Initial Setup

 |
431-955 February 2020 |
2 Introduction
VectorPro™, VectorPro™ MT and VectorPro™ Lite are all registered trademarks of Mecmesin Ltd.
VectorPro is a dedicated software solution used for the programming and acquisition of data from a range of Mecmesin test stands and instruments.
The software enables users to capture data from Mecmesin test stands and instruments, perform calculations and export/report calculations and test data. In addition, VectorPro can provide secure audit trails and user management systems. Operation sequences can be constructed by intuitive drag-and-drop control, with test editing including versioning control for full traceability. The test attributes system can be used to store information such as lists, notes and images.
2.1 User Manual Icons
Throughout this manual, the icons shown below are used to identify important health and safety information as well as additional installation/operation guidance. Do not proceed until each individual message is read and thoroughly understood.
2.1.1 Warning
2.1.2 Caution
2.1.3 Information
2.2 User Guidance
This user manual covers the initial installation and setup of VectorPro only, for further guidance relating to other aspects of VectorPro please refer to one of the documents listed below.
2.2.1 VectorPro™ User Manuals
Click one of the links below to navigate to the applicable user manual.
 |
 |
 |
A detailed guide to designing a test for VectorPro MT compliant test systems. |
|
Covers designing a test for VectorPro Lite compliant test stands and devices |
 |
 |
All Tests Viewer and Results Viewer A guide explaining the functionality of the All Tests Viewer and Results Viewer. |
 |
 |
|
View the latest version of the Mecmesin VectorPro Software License Agreement. |
3 Device Groups
This manual covers the use of VectorPro with all compatible Mecmesin devices, although some sections are only relevant to specific instruments. To improve the accessibility of this document, all compatible Mecmesin devices have been placed into three groups. This is detailed further in the following sections 'VectorPro™ MT - Materials Test Stands', 'VectorPro™ Lite - Motorised Test Stands' and 'VectorPro™ Lite - Portable Instruments'. Software features associated with these device groups are split into two further categories:
- VectorPro MT (Material Test) - This contains advanced calculations and operation functions. MT devices support high precision ELS and extensometry devices. Compatible with material test stands.
- VectorPro Lite - This contains standard calculations and operation functions. Compatible with motorised test stands and instruments.
Sections relevant to only specific device groups are denoted at the start of the section and can be skipped if they aren’t relevant to the test stand or instrument being used.
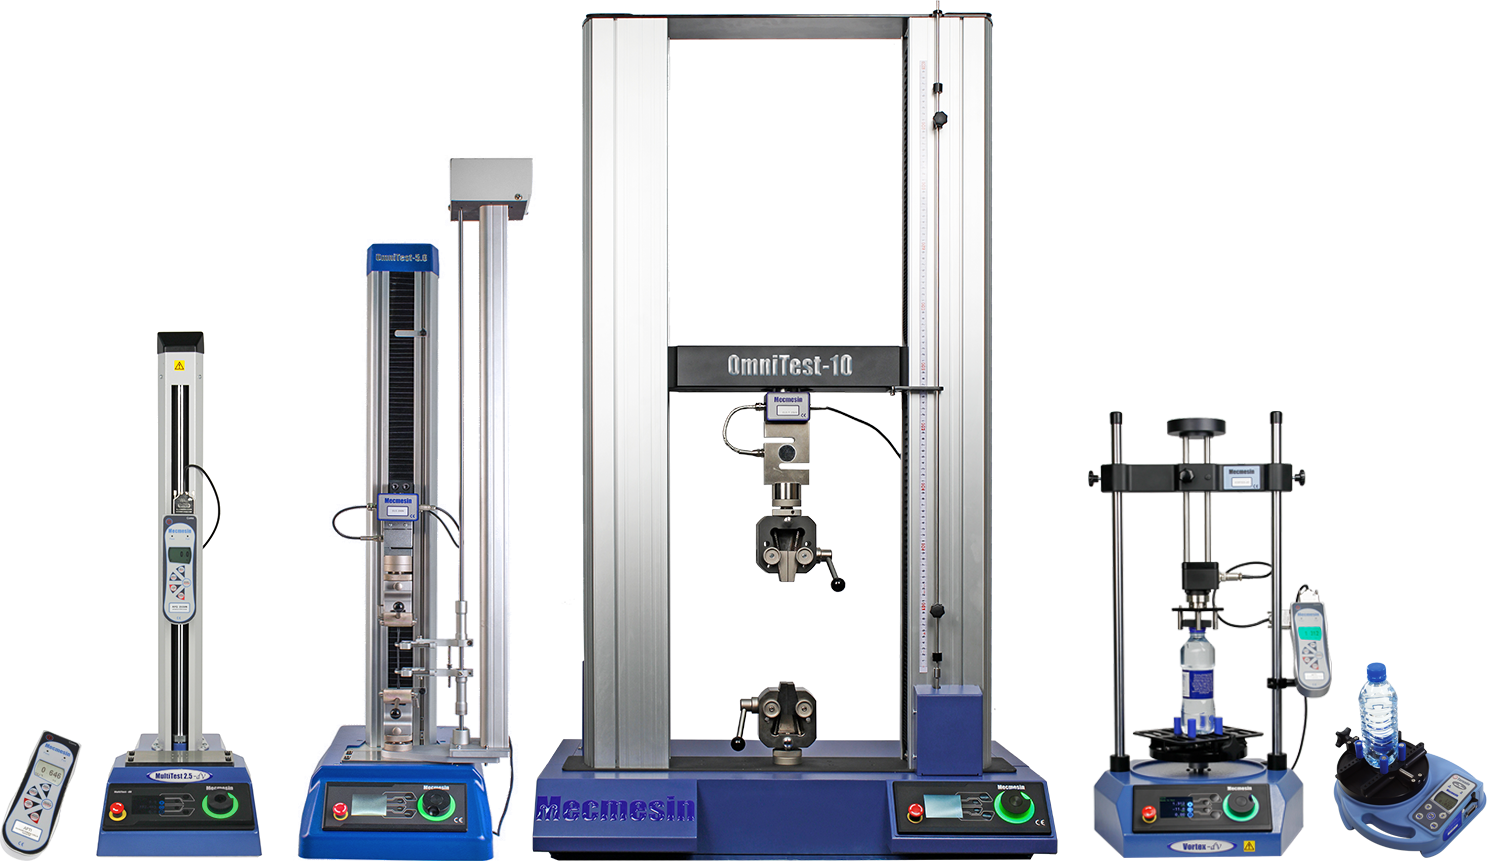
Some of the test stands and instruments compatible with VectorPro.
3.1 Contextual help
|
The symbol displayed left, is seen within VectorPro in many places, such as operations and test settings. Clicking the contextual help symbol displays help text and images to explain the setting or operation function. |
In the example below clicking the 'Contextual Help' icon displays a pop-up detailing the operation's function.
3.2 VectorPro™ MT - Materials Test Stands
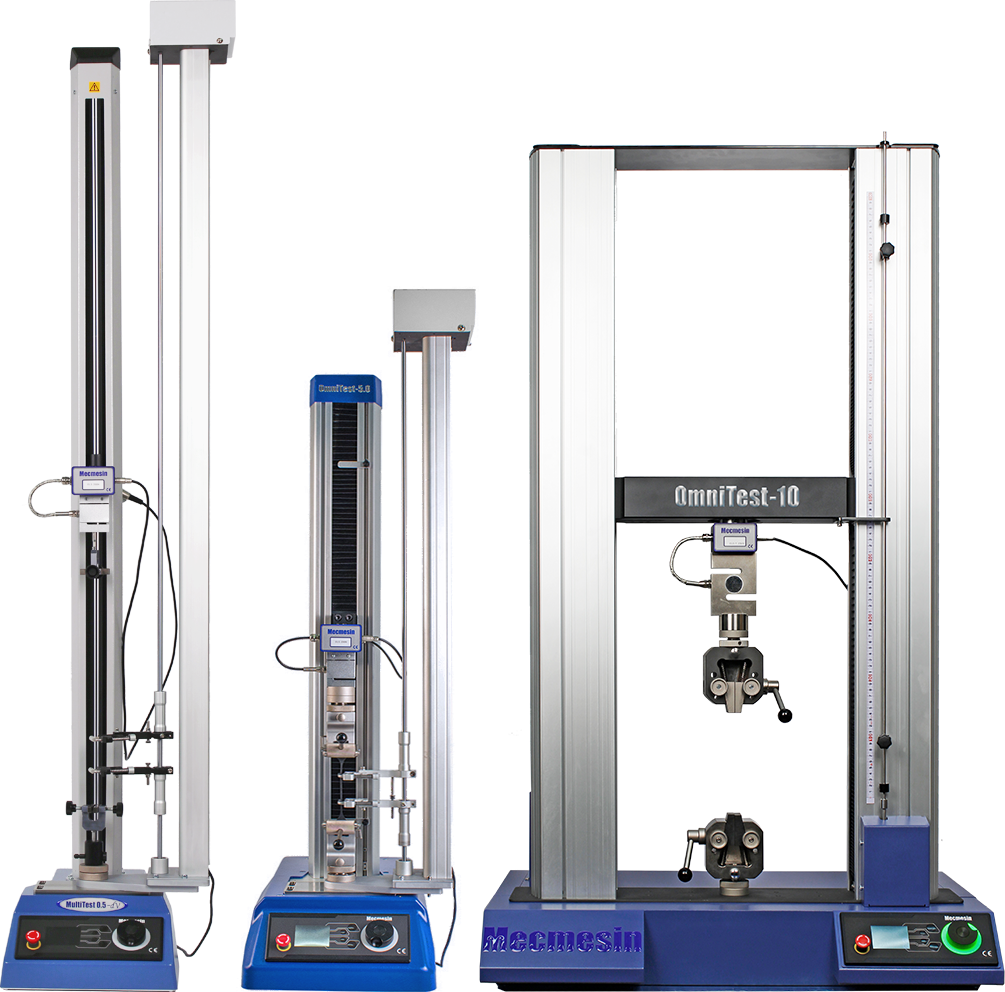
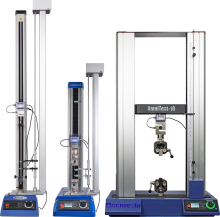
From left to right, MultiTest-dV with dV(u) mode enabled, OmniTest-5.0 kN single column test stand and OmniTest-10 kN twin column test stand.
Materials test stands are designed to perform a range of materials testing procedures, as well as some product test applications.
The range of rigid test frames enables the properties of metals, plastics, polymers, alloys, composites, wood, fabrics, glass, laminates and ceramics to be accurately tested in tension and compression with forces up to 50 kN (11,240 lfb).
3.3 VectorPro™ Lite - Motorised Test Stands
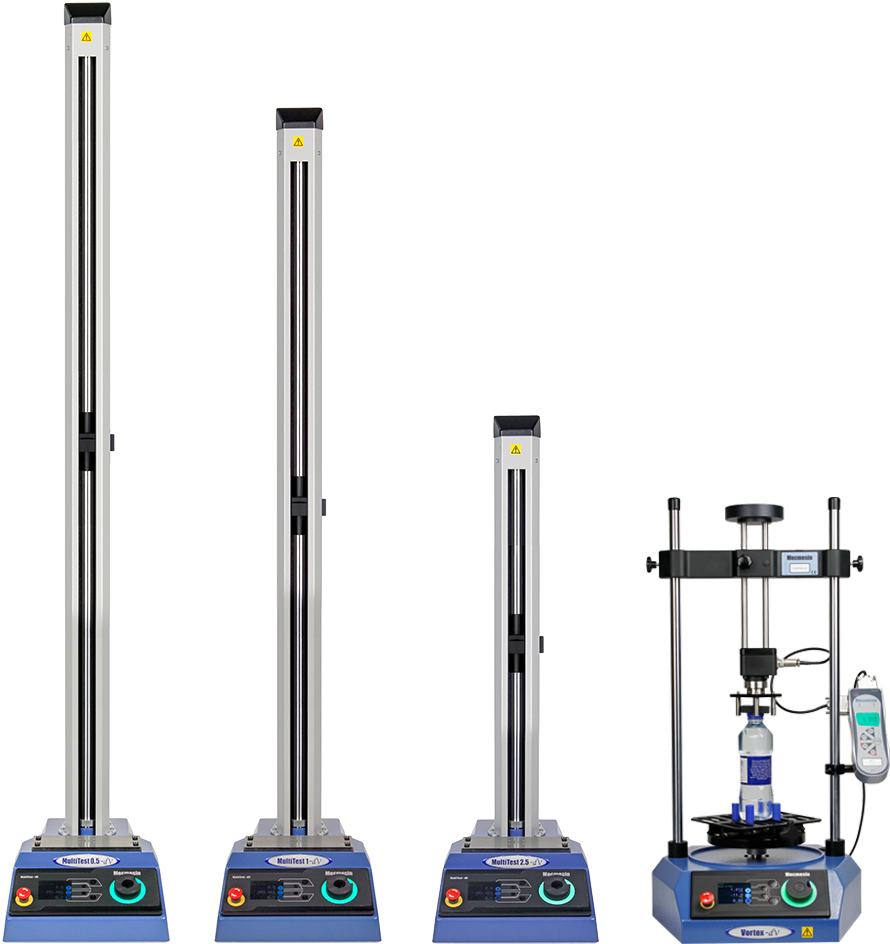
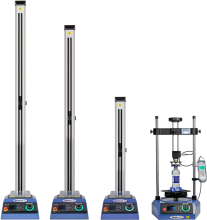
From left to right, MultiTest-dV 0.5 kN, MultiTest-dV 1.0 kN, MultiTest-dV 2.5 kN and Vortex-dV test stands.
Mecmesin motorised test stands are designed for a wide range of applications and are available in both force and torque variants.
The MultiTest-dV range integrates with the Mecmesin AFG, a versatile and fully-featured digital force gauge, available in 10 load capacities from 2.5 N to 2.5 kN. Stand capacities include 0.5 kN, 1.0 kN and 2.5 kN variants.
The Vortex-dV integrates with the Mecmesin AFTI and is a versatile torque testing system, comprising of a precision-controlled motorised stand with a choice of torque transducers; 1.5 N.m, 3 N.m, 6 N.m and 10 N.m.
3.4 VectorPro™ Lite - Portable Instruments
 |
From left to right, AFTI with torque screwdriver, AFG 500N, Tornado closure torque tester and Orbis closure torque tester.
Mecmesin portable instruments are designed for manual operation and in conjunction with VectorPro can be used to capture force and torque readings.
Advanced Force Gauges (AFG) are available in 10 models from 2.5N to 2500N capacity. Both AFG and Advanced Force/Torque Indicator (AFTI) devices are also compatible with Mecmesin external Smart force and torque transducers for increased flexibility.
Tornado and Orbis torque testers are versatile instruments for manually measuring low-level torque up to 10 N.m (Orbis limited to 6 N.m). They provide practical operation, combined with advanced features for easy and accurate testing of clockwise and counter-clockwise torques.
4 System Requirements
Windows 10 and 11 are supported only in 64-bit architecture forms. It is recommended for an optimal experience that VectorPro is run on Windows 10-64 bit.
The recommended specification is listed below:
- Intel Core i7 processor (or equivalent)
- 16GB RAM
- At least one free USB 2.0 or USB 3.0 port
- Solid State Disk (SSD) with 10GB free space
- Screen resolution 1920x1080 (Full HD)
- Windows 10 64-bit
5 Installing VectorPro™
If VectorPro is installed on the PC it is recommended to backup any existing database before updating the software. The default save location is:
- C:\ProgramData\Mecmesin\
Copy the entire ‘VectorPro’ folder to a safe location.
If a database is being used in a custom location or, if a database folder has been renamed from the default ‘VectorPro’, then this folder should also be backed up. It is important to ensure there are no spaces in the address of the custom save location before updating. In some instances, spaces in the location address can stop the software from updating the database. For example:
- C:\Users\Mark\Documents\Test Files\
Is not an acceptable save location as it contains a space in the address between the words ‘Test’ and ‘Files'.
- C:\Users\Mark\Documents\TestFiles\
The address above is acceptable as there are no spaces
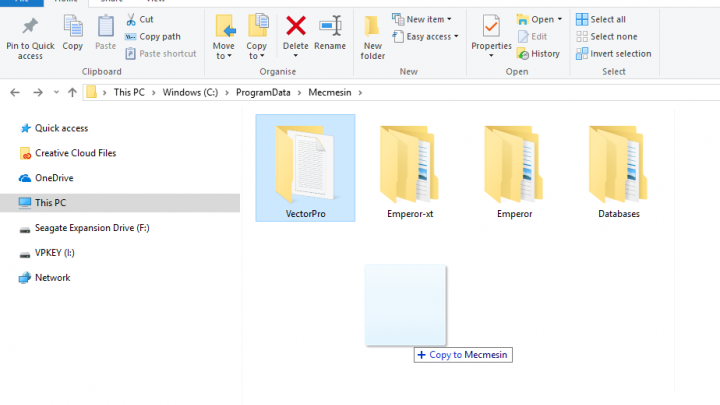
Copying the default database to create a backup. This is recommended before installing a new version of VectorPro.
5.1 Installing VectorPro™ (Clean install)
The installation software is supplied on a USB key. In some instances, it may be supplied via an online download. This download should be copied to a location from where it can be run on the PC required. Please do not connect the test equipment until the installation has been completed.
Check the PC Specification
Before installing VectorPro check whether the selected PC is 64-bit or 32-bit. If unsure of the architecture of the computer, contact the local IT administrator for help.
Locate the Installation Folder
Insert the VectorPro key into the PC and locate the installation folder called:
- FullInstaller-VectorPro-X.X.X.0-with-licence.
(Where ‘X’ denotes Product, Build, and Revision number)
Start the Installer 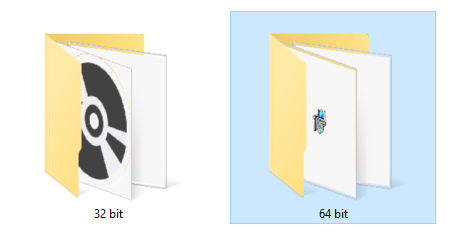
First, select either the 32-bit or 64-bit folder depending on the computer's architecture. Within this folder there are the following files:
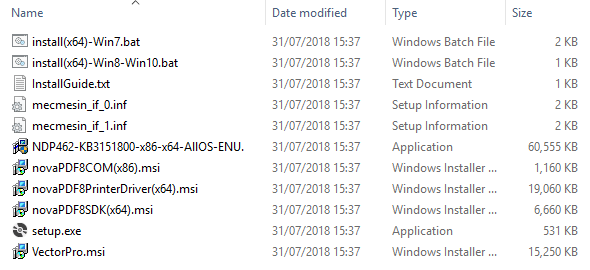
The files shown on the previous page are for a 64-bit installation. The 32-bit version file names differ.
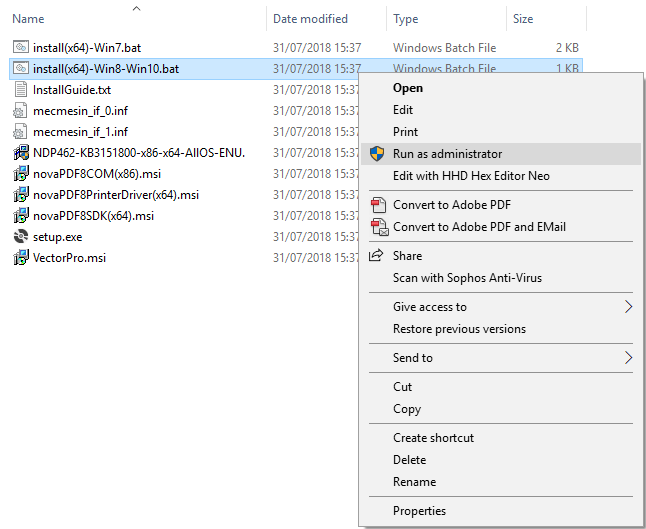
Right-click on the appropriate ‘.bat’ file and select ‘Run as administrator’. Windows 7 users should use the ‘install(x64)-Win7.bat’ and users running Windows 8/10 should use the ‘install(x64)-Win8-Win10.bat’
Installing VectorPro™
In some instances, Windows Defender* may prevent the installer from running and the screen below is presented, please select ‘More information’ and then the ‘Run anyway’ option.
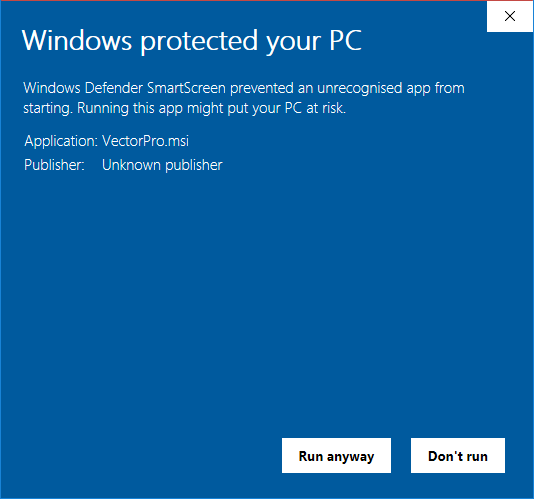
*Windows Defender is a trademark of Microsoft Corporation.
A black command prompt window should now appear onscreen (Shown Below). This manages the installation of the VectorPro associated drivers and PDF printing software.
Once the installation of the associated drivers is completed, the main VectorPro setup installer will launch.
Before continuing the installation it is important that the software license agreement is read and understood in full; failure to ‘Agree’ will terminate the installation of the software. This document is also available to view here - Software License Agreement.
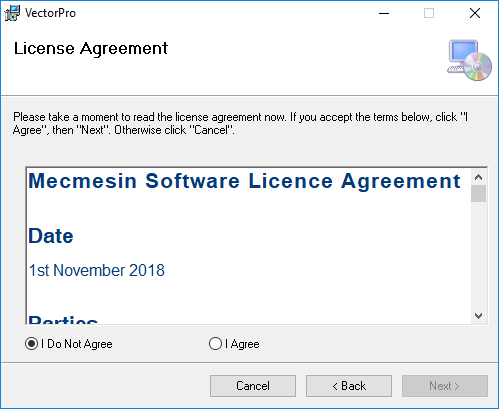
To continue, press the ‘Next’ button. The window on the next page is then displayed.
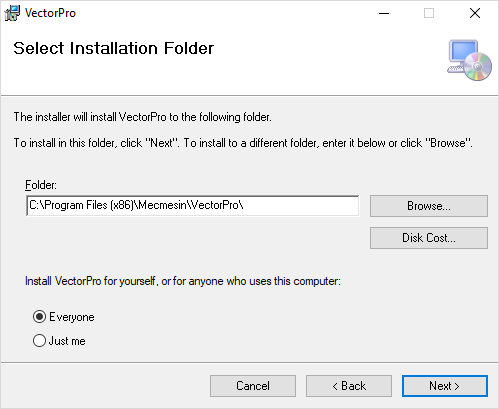
Next, select the installation location and whether the software installs for just the current user (Just me) or all users (Everyone) on this PC. Press ‘Next’ to continue. Once the installer is finished press ‘Close’, VectorPro can now be launched.
5.2 Important Installation Information
Please ensure that all Windows user accounts that launch VectorPro has Admin ‘Full Control’ access to the following locations:
- Default database location: C:\ProgramData\Mecmesin\VectorPro\
- Default install location (Windows 10 example): C:\Program Files (x86)\Mecmesin\VectorPro\
- Custom database location: If a custom database location is used, users must also have admin access within Windows for this location
6 Connecting a Mecmesin device
6.1 USB Test Stands
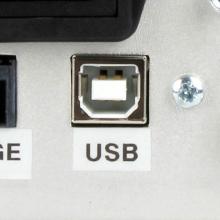 |
The following devices connect via USB-B to USB-A communications cable - Part No. 351-093:
|
To connect and use VectorPro, firstly connect the device to a PC using a USB-B to USB-A cable. Switch on the test stand and open VectorPro, the device is shown as connected on the USB connection icon (located at the top left of the software screen).
For more information relating to USB connected test stands please refer to the 'VectorPro Header Bar Features' section located in the Workspace and User Management User Manual.
6.1.1 Driver Information

If the test stand does not show as connected open Windows ‘Device Manager’ to ensure that the correct driver is installed. Under ‘Universal Serial Bus devices’, two items called ‘Mecmesin Instrument Device’ should be displayed, as shown in the image above.
6.2 RS232 Instruments
The following Mecmesin gauges and instruments connect via D-Sub RS232 to USB-A communications cable, the cable part numbers are listed next to the compatible instruments below:
- AFG/AFTI – Cable Part No. 351-086,
- BFG - Cable Part No. 351-087,
- CFG+ - Please consult the local Mecmesin agent for the required information,
- Orbis - Cable Part No. 351-086,
- Tornado - Cable Part No. 351-086.
To connect the device, plug the USB to RS232 cable into the PC’s USB port and the device’s RS232 communication port.
Ensure that the gauge RS232 settings are configured correctly, for more information consult the relevant gauge user manual.
Switch on the device and open VectorPro.
6.2.1 RS232 Instruments Driver Information
In most instances, driver installation is handled within Windows automatically but if the device does not connect to VectorPro the driver can be manually installed.
The driver installer is available as an executable from the following link:
6.2.2 RS232 Instruments Communication Settings
To achieve communication between an RS232 instrument and VectorPro the correct settings must be applied within the devices communication menu. The device should be configured as followed:
- TX Units is set to ‘On’,
- TX Sign is set to ‘On’,
- Baud Rate is set to ‘115200’,
- CR LF is selected,
- Line Delay is set to ‘0’,
- RS232 transmission is selected,
For help setting the device communication settings please consult the relevant device’s operating manual:
- 431-262 Orbis Digital Torque Tester, Operating Manual
- 431-261 Tornado Digital Torque Tester, Operating Manual
- 431-213 Advanced Force Gauge (AFG Mk4) Operating Manual
7 Launching VectorPro™
The login dialogue for VectorPro is pictured below. The version number is displayed under the VectorPro title.
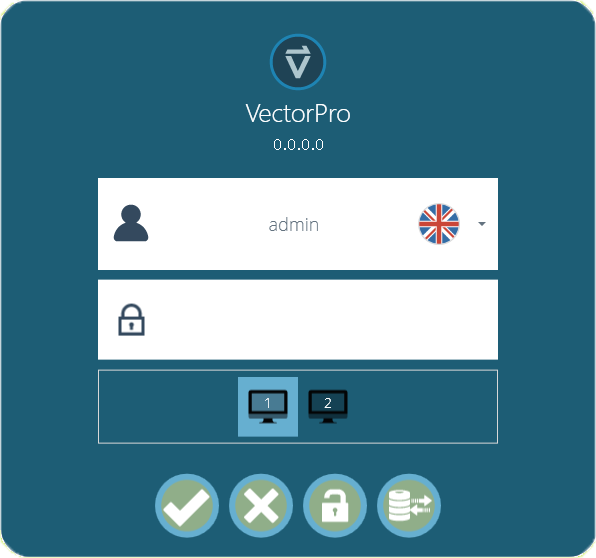
This window consists of the following elements:
| Enter the username and password, then click to open VectorPro. The default password for user ‘admin’ is ‘admin’. Passwords are case sensitive. |
|
| Click to exit VectorPro. | |
|
In the event of completely lost administrative access, Mecmesin Technical Support can unlock the system. Contact – support@mecmesin.com |
|
| After entering the password, click to select a different database for tests and results (for example, imported from another test location or office). Available only to administrator login. After selection, continue with normal login. | |
 |
The monitor icon appears when more than one monitor is connected. These are used to select which screen VectorPro opens on upon login. Select between the primary and additional monitors. |
Clicking the username field displays a list of all available users. The flag denotes the language setting last used by each user.

The user’s language can be set when the user is logged on. Here, all the users operate with the English language apart from ‘Petter’ who uses Swedish.
7.1 Database Upgrade
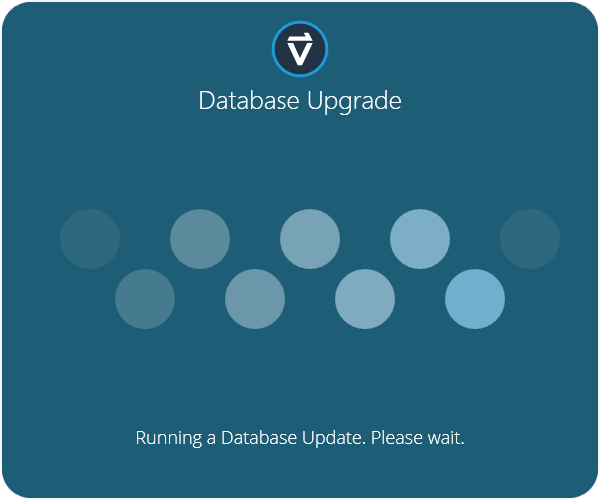
When opening an existing database with a new version of VectorPro the software automatically carries out a database upgrade at launch. The upgrade is indicated by the database upgrade window opening (pictured above).
8 Further Information
For more information relating to VectorPro, please return to the User Guidance section of this user manual and continue to the next applicable user manual.